Werth Sensor & Accessories for X-Ray Computed Tomography (CT) Machine
Brand: Werth Messtechnik
Category: Optical Instruments, Werth Messtechnik, X-Ray Computed Tomography Machine, X-Ray Computed Tomography Machine
Werth Computed Tomography CT Sensor & Accesories
Fast 3D complete measurement inside and outside in highest resolution
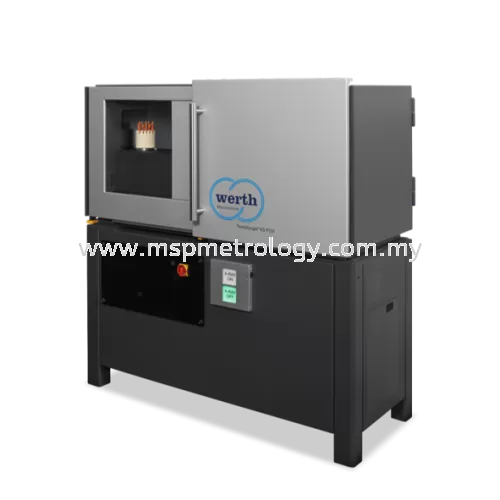
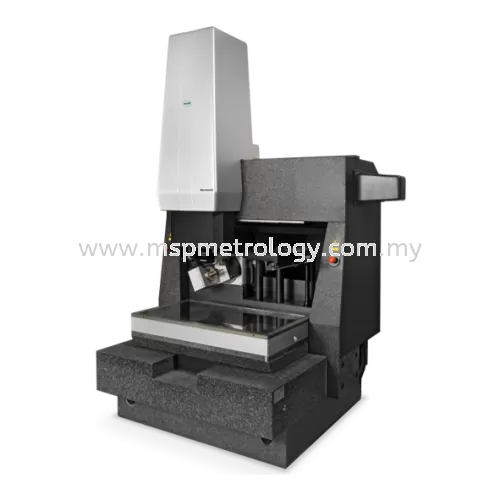
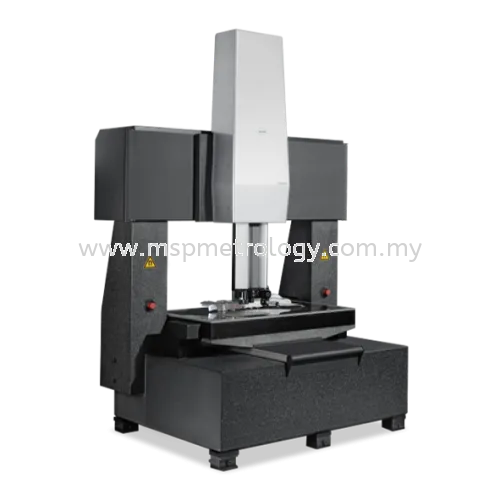
High-performance hardware and intelligent measurement software enable coordinate measuring machines with computed tomography to achieve ever higher accuracies and measuring speeds. This means that industrial computed tomography can now also be used for fast 3D measurements close to production and statistical process control (SPC) in addition to applications in the laboratory and the measuring room. Unlike other sensors, the complete three-dimensional workpiece volume, including undercuts and internal geometries, is always available as a measurement result at the touch of a button.

- Standard-compliant calibration of all machines, also with DAkkS certificate
- A sub-voxeling procedure guarantees a high spatial resolution and thus a low measurement uncertainty
- Structural resolution can be further improved by using special measuring methods such as Multi-ROI and Raster Tomography
- Real-time reconstruction parallel to image acquisition makes the measurement results available immediately according to the end of the scanning process
- Reduction of measurement time with OnTheFly CT enables measurements close to production with high throughput

Technical Data
Sensor principle
X-ray tomographic
Measuring range
Max. Workpiece dimensions D = 120 mm / L = 93 mm to D = 500 mm / L = 1010 mm (depending on the aspect ratio of the workpieces)
Accuracy
Permissible probing error up to 2.5 µm
Functionality
The radiation emitted by the X-ray tube a) produces X-ray images of the workpiece b) on the detector c). A virtual workpiece volume is reconstructed from the X-ray images taken in different rotational positions.
X-Ray Sources
Macrofocus reflection in monoblock design
Cost-effective high-performance X-ray source for economical measurement

Fast measurement of small workpieces
This maintenance-free source type offers high availability and is therefore ideal for use close to production. The warranty is two years without shift limitation. The high tube power of up to 500 watts enables very short measuring times.
- With an acceleration voltage of up to 160 kV, even denser workpieces made of e.g. aluminum or zinc die-cast can be measured
- The high tube power together with a correspondingly fast detector and the software function OnTheFly CT results in short measuring times even when using beam hardening filters
- The compact design enables use in all machines
Technical Data
Acceleration voltages
up to 160 kV
Tube Power
up to 500 W
Macrofocus reflection with separate voltage generator
High-power X-ray source for fast inline measurement
.png) Fast measurement of dense or large workpieces
Fast measurement of dense or large workpieces
The high tube powers of up to 1500 watts enable very short measuring times and make this source ideal for inline or atline applications. Long maintenance intervals paired with high power predestine this source type for measuring tasks with high demands on measuring speed and availability.
- With a tube voltage of up to 450 kV, even denser workpieces or assemblies made of e.g. aluminum or zinc die-cast can be measured
- In combination with an appropriately fast detector and the OnTheFly CT software function, very short measuring times are possible, even when using beam hardening filters
- A special image acquisition technique that combines macrofocus and microfocus sources can reduce artefacts in larger assemblies or denser workpieces and significantly increase detail recognition
Technical Data
Acceleration voltages
up to 450kV
Tube Power
up to 1500 W
Microfocus transmission in monoblock design
High-resolution X-ray source for economical measurement with high resolution
.png) Fast measurement with high resolution in compact design
Fast measurement with high resolution in compact design
These X-ray sources in monoblock design, unique in the market, enable measurements in high resolution with extremely short measuring times. By using transmission targets, these tubes offer focal spot sizes of a few micrometres even at high powers. This allows up to five times higher measuring speed compared to sources with reflection target. The unique monoblock design in open construction, where the tube head, the high voltage generator and the vacuum pump form one unit, allows very low maintenance costs with unlimited lifetime.
- The maintenance interval of the monobloc tubes is 12 months, usually the service is carried out as part of the annual maintenance of the machine
- Due to the open design, wearing parts of the source can be replaced if necessary
- The compact design allows the use in all, even very space-saving machine types
- The acceleration voltage can be upgraded from 130 kV to 160 kV without having to replace the source
- At an acceleration voltage of 200 kV, workpieces with higher density and longer radiographic lengths can also be measured
- Long-life components ensure high availability even in multi-shift operation
Technical Data
Acceleration voltages
up to 160 kV and 200 kV respectively
Tube Power
up to 80 W
Microfocus reflection in monoblock design
Microfocus X-ray source for economical measurement with medium resolution
.png)
Maintenance-free X-ray source in compact design
This X-ray source offers high availability and is therefore predestined for use close to production. The closed monoblock design allows maintenance-free use of the source. Power-dependent focussing allows the measurement of the smallest details.
- The compact dimensions allow universal use in all machine types
Technical Data
Acceleration voltages
up to 130 kV
Tube Power
up to 40 W
Microfocus transmission with separate voltage generator
High-resolution X-ray source for larger workpieces
.png)
Fast measurement with high resolution of dense or large workpieces
By using a high power transmission target, these sources offer focal spot sizes of a few microns even at high powers. This allows up to five times higher measuring speed compared to sources with reflection target. Due to the high acceleration voltages of up to 300 kV, even dense and larger workpieces or assemblies can be measured with high resolution in the shortest possible time.
- The open design means that consumable parts of the source can be replaced as required, giving an unlimited lifetime
- The power of up to 80 W, together with the software function OnTheFly CT, results in even shorter measuring times with a resolution of a few micrometres
- Long-life components ensure high availability even in multi-shift operation
Technical Data
Acceleration voltages
up to 300 kV
Tube Power
up to 80 W
Microfocus reflection with separate voltage generator
High power X-ray source for fast inline measurement
.png)
Fast measurement of dense or large workpieces
The high tube powers of up to 1500 watts enable very short measuring times and make this source ideal for inline or atline applications. Long maintenance intervals paired with high power predestine this source type for measuring tasks with high demands on measuring speed and availability.
- With a tube voltage of up to 450 kV, it is also possible to measure denser workpieces or assemblies made of e.g. aluminum or zinc die-cast
- In combination with an appropriately fast detector and the OnTheFly CT software function, very short measuring times are possible, even when using beam hardening filters
- A special image acquisition technique that combines macrofocus and microfocus sources can reduce artefacts in larger assemblies or denser workpieces and significantly increase detail recognition
Technical Data
Acceleration voltages
up to 450 kV
Tube Power
up to 1500 W
Sub-microfocus transmission with separate voltage generator
X-ray source with sub-micrometre resolution
.png)
Measurement with highest resolution in the sub-micrometer range
By using a high-performance transmission target with separate cooling and refocusing of the electron beam, these sources offer focal spot sizes in the sub-micrometre range. Evaluations of micro-structures such as particles, fibres, layer thicknesses, micro-cracks or voids are no problem. With acceleration voltages of up to 240 kV, even small metal workpieces can be tomographed and evaluated with micrometre precision.
- With a tube voltage of up to 450 kV, it is also possible to measure denser workpieces or assemblies made of e.g. aluminum or zinc die-cast
- In combination with an appropriately fast detector and the OnTheFly CT software function, very short measuring times are possible, even when using beam hardening filters
- A special image acquisition technique that combines macrofocus and microfocus sources can reduce artefacts in larger assemblies or denser workpieces and significantly increase detail recognition
Technical Data
Acceleration voltages
up to 240 kV
Tube Power
up to 50 W
X-Ray Detector
Area sensor for X-rays
.png)
Energy-efficient measurement with area sensors
According to requirements, various area sensors can be used in Werth coordinate measuring machines with X-ray computed tomography. These differ, among other things, in their design, dimensions, pixel size and number, and speed. A modular device design allows optimum adaptation to the respective requirements.
- Different sizes from 50 mm up to 430 mm edge length result in different “in the image” and “on the image” measuring ranges
- The number of pixels per detector line varies between 1000 pixels and 6000 pixels, the total number of pixels ranges from one to 36 megapixels. The resolution can thus be optimally adapted to the size of the workpiece and the required metrological resolution.
- By binning, detectors with many pixels can be used for faster measurement with less data
- The fastest detectors have exposure times of a few milliseconds and offer high measuring speeds in combination with powerful tubes and OnTheFly CT
- With pixel sizes down to 50 µm, even the smallest structures can be resolved
- The area detectors can also be operated in line sensor mode under software control
- Depending on the type, they can be used for acceleration voltages between 130 kV and 450 kV
Technical Data
Pixel sizes
between 50 µm and 400 µm
Integration times
up to 15 milliseconds
Sensor surfaces
from 50 mm x 50 mm to 430 mm x 430 mm
Number of pixels per detector line
from 1000 pixels to 6000 pixels
Accessories
.png)
Inquiry - Werth Sensor & Accessories for X-Ray Computed Tomography (CT) Machine







.png)
