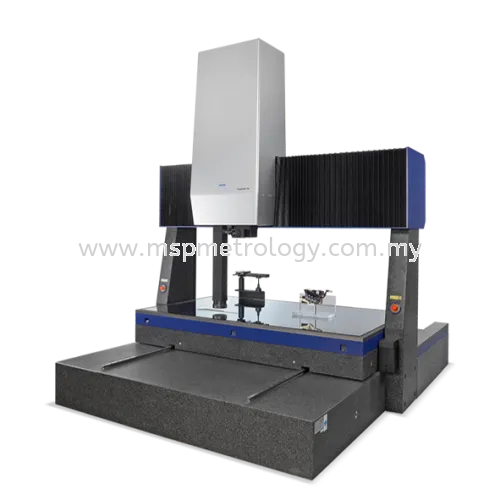
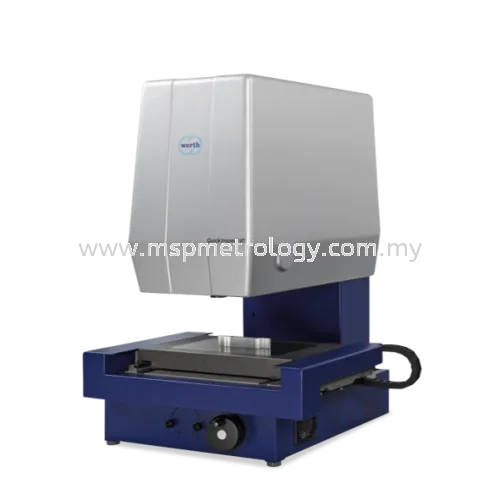
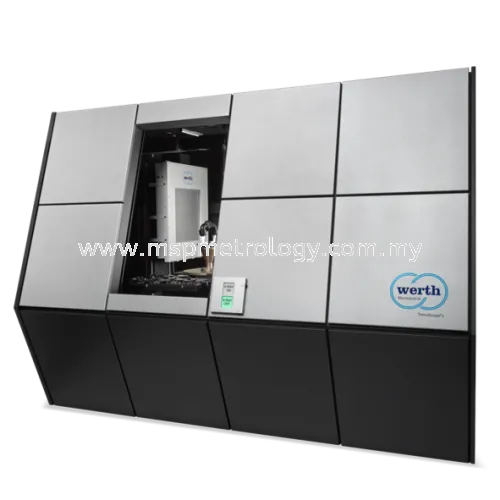
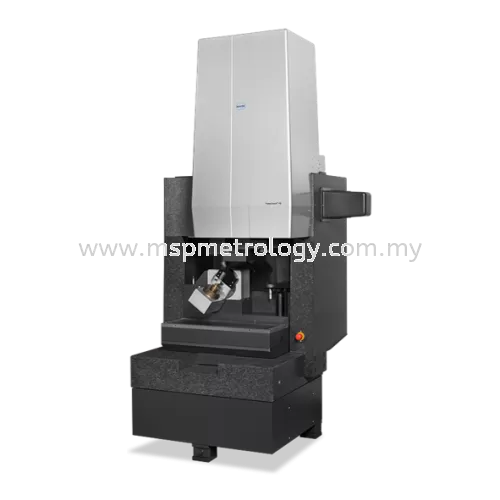
Werth Multisensor Coordinate Measuring Machine VideoCheck DZ HA Series
Brand: Werth Messtechnik
Category: Optical Instruments, Vision Measuring Machine, Werth Messtechnik, Vision Measuring Machine
VideoCheck® DZ HA
Multisensor Technology with the Highest Flexibility for Production Control & Laboratory
- Maximum utilization of the measuring range with two independent Z axes
- Reduction of the collision risk between sensors and workpiece
- Second Z axis is also available as an option
- Contour image processing for automatic measurement of regular and free-form geometries in incident and transmitted light
- Ideally suited for the integration of additional sensors
- Measurement in the Z axis with fast autofocus
- High flexibility due to variable illumination sources
- Temperature-stable highly accurate incremental measuring system
- Fast CNC continuous-path control
Production monitoring or laboratory, small or large workpieces, optical sensors, multi-sensor systems – Werth offers the right video measuring machine. Consistent quality assurance and acceptance tests according to VDI 2617 or ISO 10360 guarantee the reliability and accuracy of the machines. Task-specific measurement errors can be reduced down to the sub-micrometre range. Competent advice based on decades of experience enables customised combinations for optimal adaptation to the respective measuring task.


Typical Applications of Different Sensor
a) Conventional probes
b) Werth Fiber Probe®
c) Laser
d) Image processing
e) Autofocus
f) Werth 3D-Patch
g) 3D Werth Fiber Probe
h) X-ray Tomography Sensor

Telecentric for Constant Image Scale
Non-telecentric images change sharpness and image scale as the object distance changes. With telecentric imaging on the object side (right), in contrast, the images have nearly constant scale.
a) Sensor plane
b) Virtual image plane
c) Telecentric diaphragm

Contour Image Processing for Reliable Measurement
In contour image processing, the image is viewed as a two-dimensional whole within an evaluation window. Contours are extracted from this image using suitable mathematical algorithms (operators). Each image point of a contour corresponds to a measurement point. The measurement points are strung together like a string of pearls. This makes it possible to detect and filter out interfering contours caused by surface structures, breakouts and dirt during measurement (contour filters) without changing the mould of the contours.

Patented Werth MultiRing®
The advantage of Patented Werth MultiRing:
- Angle of incidence selectable
- No loss of working distance
- No mechanically moving parts
- Large angle range adjustable
- White high power LEDs

Werth Autofocus Sensor
By combining the non-contact measuring methods of image processing and autofocus sensor, many three-dimensional measuring tasks can be solved. The features of Werth Autofocus:
- Integrated in Werth Zoom
- Measuring on low-contrast surfaces
- Standard configuration for highest magnification
- Selection via sensor button
- Also usable with 3D patch

Werth FlatLight®
Minimizing out of focus condition with a special illumination device with a small numerical aperture. Even high and rounded profile sections can be measured with great precision.
WinWerth® Software
The operation of machines with a wide variety of sensors, but also the evaluation of volume data and point clouds are possible with WinWerth® in a unique combination. The Werth image processing software is based on 40 years of experience and is the foundation of probably the most powerful image processing sensors for coordinate measuring machines currently available. Optical distance sensors, conventional styluses in single-point or scanning mode, the Werth Fiber Probe®, X-ray computed tomography or machines with a combination of several sensors are all supported by the uniform concept. Measurement points, 2D images or volume data can also be conveniently evaluated in terms of geometrical characteristics or with part-to-part deviation analysis. PTB-certified evaluation algorithms ensure correct measurement results. All desired information is displayed in the graphic: CAD models with PMI data, voxel volumes, measurement point clouds, colour-coded deviation plots from 3D nominal-actual comparisons, video images, measurement and calculation elements as well as flags with nominal and actual values, tolerances and deviations. In order to meet the most diverse requirements, the software has a modular structure. Various machines can be operated, from simple measuring projectors to complex multi-axis coordinate measuring machines with multi-sensor systems or even X-ray tomography sensors.


Image Processing Measures almost by Itself
The “intelligence” of the WinWerth® measurement software then takes over, for example, the exact determination of the object area to be captured, the selection of the geometrical element to be measured (e.g. e.g. straight line, circle, corner point) as well as the linking algorithms for determining geometrical characteristics such as distances, angles and diameters.

Measurement Points Distributed Automatically
Measurement points or scan lines are automatically distributed on the geometry elements to be measured, e.g. as circles, cylinder surface lines, stars or spirals, taking into account the necessary travel paths. In this way, the complete measurement sequence, including evaluation, is first created offline using the CAD model or online with the minimum number of points for the respective geometry element.

Evaluating Images Perfectly for Optics and Computer Tomography Scan
The evaluation is mainly realised by PC hardware and software. In a first processing step, the image can be improved with image filters (optimising contrast, smoothing surface disturbances). This enables reliable measurements even with difficult edges and rigid scanning in incident light.

Testing and Changing Made Easy
The feature tree in the WinWerth® user interface also controls the test and change mode, in which programmes can be run step-by-step and changes can be added. A text editor, available in parallel, allows experienced operators to directly enter or change DMIS programme code while teaching in programmes.

CAD-Online® and CAD-Offline®
Measurement programs can be generated both online and offline using 2D or 3D CAD models. The CAD models are imported in either STEP, native CAD or IGES format. In offline mode a sensor is selected and a patch or combination of several patches is selected on the CAD model. The software computes the necessary actions for the sensor and automatically generates the corresponding segment of the program. The graphic shows the simulated measurement sequence. In online mode the procedure is similar to the offline mode, but the coordinate measuring machine immediately performs each operational step so it can be observed “live.

Volume Section Sensor
With 2D contour image processing and the associated image processing filters, measurements can also be taken in any cross section of the CT volume or point cloud. Among other things, this makes the measurement of workpieces made of several materials particularly easy.

Eccentric Sections can be Scanned Tomographically with Multi-ROI CT
With the help of section tomography or ROI tomography (ROI: Region of Interest), parts of the measuring object are measured with high resolution without having to capture the entire measuring object, e.g. , completely with high resolution using Raster Tomography, which is time-consuming and requires a lot of memory. Multi-ROI tomography offers a combination of the benefits of eccentric and sectional tomography scans. Multiple parts with high resolution can also be selected at any position in the measuring object.

Automatic Burr Detection
A special feature of Werth is the automatic detection and measurement of burrs or chips during the measurement sequence. The result is a colour-coded deviation plot of the burr and the maximum burr length. The deviation display optionally shows only those points where the burr length exceeds the tolerance limits. The burr length along the entire burr can also be displayed numerically via analysis markers. For example, every 0.5 mm a flag is set that contains the maximum local burr length.

Graphic Displays and Reports
WinWerth® displays all the measured elements along with the selected geometrical characteristics in the 2D or 3D graphics window. The report generator summarizes the various outputs in “Office style.
Specifications
| Model | VideoCheck® DZ HA |
| General | |
| Machine Type | Fixed bridge-type multisensor coordinate measuring machine |
| Probing System | Optical probing systems: image processing sensor, laser Mechanical probing systems: trigger probe, dynamic probe, fiber probe |
| Modes of Operation | Continuous-path control |
| Measuring Software | WinWerth® |
| Operating System | MS Windows |
| Measuring Range | |
| - | X = 400 (530) mm – 1000 (1130) mm (16 (21 in.) – 39 (44 in.)) |
| Y = 400 mm – 2000 mm (16 in. – 79 in.) | |
| Z = 300 mm – 600 mm (12 in. – 24 in.) | |
| Dimensions and Masses (Min. Installation area ): | |
| Depth | 1300 mm – 4350 mm (51.2 in. – 171.3 in.) |
| Width | 1274 mm – 2436 mm (50.2 in. – 95.9 in.) |
| Height | 2000 mm – 3700 mm (78.7 in. – 145.7 in.) |
| Machine Weight | 1500 / 12400 kg (3307 – 27342 lbs.) |
| Workpiece Weight mmax | 150 kg (330.8 lbs.) (optional 300 kg (661.5 lbs.) |
| Further Performance Data | |
| Resolution of Linear Measuring System | 0.01 µm (0.0000004″) |
| Positioning Speed, vmax | 60 mm/s |
| Acceleration, amax | 250 mm/s² |
| Supply Data** | |
| Voltage | 230 V (115 V) ±10% |
| Frequency | 48 – 62 Hz |
| Power Consumption | Max. 2500VA |
| Air Pressure | 7 – 10 bar (101.5 – 145 psi) |
| Air Consumption | – with one Z-axis: 12000 Nl/h (7.06 CFM) – with second Z-axis: 18000 Nl/h (10.59 CFM) |
| Permissible Environmental Conditions | |
| Environmental Air | Humidity 40% – 70% rel. hum., oil free |
| Air Contamination | Max. 0.05 mg/m³ (3 x 10⁻⁹ lb/cu ft) |
| Operating Temperature | 10 – 35 °C (50 – 95 °F) |
| Maximum Permissible Error MPE (extract) | |||
| For standard laboratory conditions | |||
| Tactile sensor SP80 2) | PF: 0.6 µm | THN = THP: 1.5 µm | E: (0.5 + L/600) µm |
| Sensor image processing 1) 2) | |||
| – unidirectional | E1: (0.25 + L/900) µm | ||
| – bidirectional | E1: (0.5 + L/900) µm | E2: (0.7 + L/600) µm | E: (1.5 + L/500) µm |
| For standard laboratory conditions | |||
| Tactile sensor SP80 3) | E3: (1.5 + L/250) µm | ||
| Sensor image processing 1) 3) | |||
| – unidirectional | E1: (0.25 + L/500) µm | ||
| – bidirectional | E1: (0.5 + L/500) µm | E2: (0.7 + L/400) µm | E: (1.5 + L/300) µm |
| No air-conditioning required | |||
| Tactile sensor SP80 4) | PF: 0.6 µm | THN = THP: 1.5 µm | E: (0.5 + L/75) µm |
| Sensor image processing 1) 4) | |||
| – unidirectional | E1: (0.25 + L/120) µm | ||
| – bidirectional | E1: (0.5 + L/120) µm | E2: (0.7 + L/700) µm | E3: (1.5 + L/75) µm |
(Where L = measuring length in mm comparable to ISO 10360 and VDI/VDE 2617)
1) Measured with image processing sensor with lens 10x or with optical sensor with equal or better probing error
2) ∂ = 20 °C ± 0.5 K ∇∂ = 0.25 K/h, 0.5 K/m SP80/β = 10x m ≤ mmax
3) ∂ = 20 °C ± 2 K ∇∂ = 1 K/h, 1 K/m SP80/β = 10x m ≤ mmax
4) ∂ = 16 °C to 30 °C ∇∂ = 2 K/h, 2 K/m SP80/β = 10x m ≤ mmax
Inquiry - Werth Multisensor Coordinate Measuring Machine VideoCheck DZ HA Series






.png)
