Werth Sensor & Accessories for Multisensor Systems
Brand: Werth Messtechnik
Category: Optical Instruments, Vision Measuring Machine, Werth Messtechnik, Vision Measuring Machine
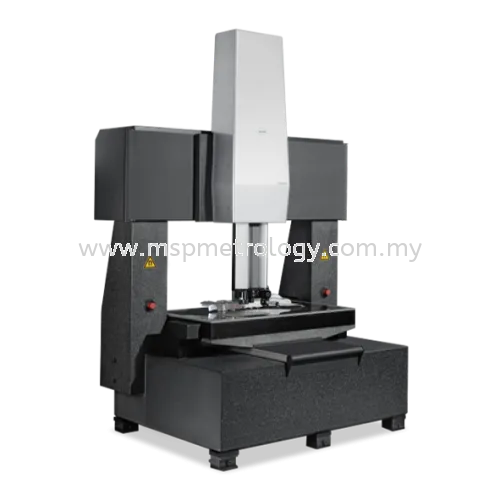
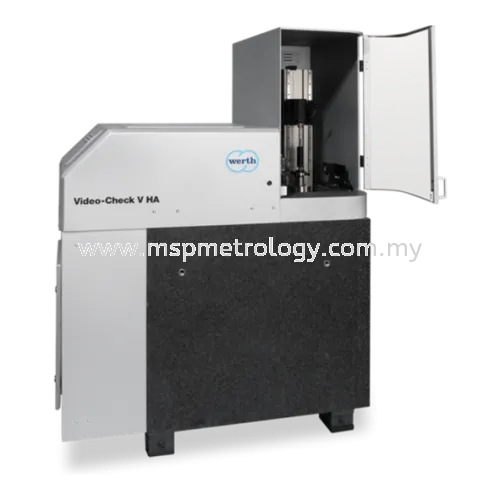
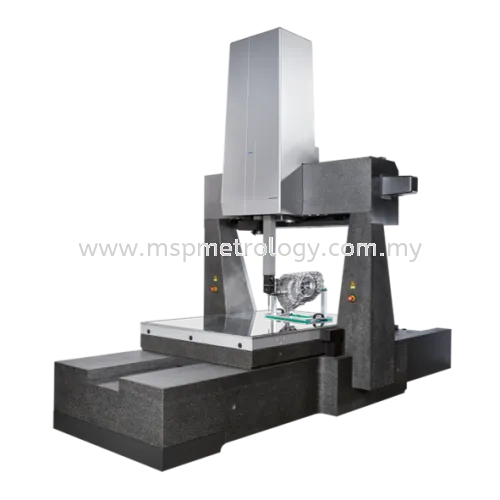
Werth C Multisensor Systems – Optical and Tactile Sensors for Any Task
The use of multi-sensor systems allows the economic solution of many measuring tasks with only one measuring machine. The properties of these sensors usually depend on their various primary applications. Regarding applications, their distinguishing characteristics include the size of the object features they can probe, the type of object features they can probe (edge, surface), and their suitability for rapidly acquiring large numbers of measured points (scanning). In order to perform complex measuring jobs, it is usually necessary to ause several different sensors for a single measuring run.
Optical Sensor
.png)
Contactless and fast signal transmission by light
The benefits of optical metrology lie in non-contact measurement. This makes it possible to measure sensitive workpieces as well as those with small features. Non-contact measurement eliminates the need for time-consuming set-up, which is difficult with small or elastic workpieces.
Tactile Sensor
.png)
Flexible and largely surface-independent measurement by contact with a stylus tip
With tactile metrology, the workpiece can be probed from all sides. Conventional measuring and tactile-optical styluses and micro-probes with different stylus systems and features are available for tactile 3D measurements of bores, cylindrical surfaces and strongly inclined planes.
Optical Sensor
Werth Image Processing BV
Highly accurate non-contact measurement
.png)
The basic equipment of most optical and multi-sensor coordinate measuring machines
Compared to other sensors, measurement with image processing usually leads to much shorter measurement times and can therefore be used for a wide variety of applications. Many measurement points are captured quickly or even simultaneously.
- Fast detection of multiple geometric elements and freeforms in the measuring window through intelligent contour image processing
- Reliable edge detection even with minimal contrast thanks to image, contour and element filters
- Patented raster scanning HD generates an overall image of the workpiece while the device axes are moving, independent of the sensor’s field of view
- Automatic adjustment of light intensity for changing surface properties and colours
- Standardisation of illumination characteristics for easy exchange of control files from different optical coordinate measuring machines possible
- Special solutions are offered by Werth Zoom and MultiRing® with variable working distance and illumination angle
Technical Data
Sensor principle
Optical-lateral
Measuring range
Field of view “in the image” 0.065 mm x 0.05 mm to 225 mm x 190 mm
Accuracy
Permissible probing error up to 0.2 µm
Functionality
In the camera a) an image of the measuring object c) is created with the aid of the imaging optics b), here with transmitted light illumination d).
Autofocus sensor
Contrast evaluation for measurement of geometrical characteristics
.png)
Distance measurement by focus variation with the hardware of the image processing sensor
By moving the lenses in the orientation of the optical axis, the sharpness (contrast) of the image is continuously evaluated for a section of the image. The contrast has its maximum where the object plane coincides with the focal plane. The sensor is then positioned accordingly to this calculated position. The accuracy of the procedure is primarily dependent on the depth of field of the lens.
- By combining the non-contact measuring methods of image processing and autofocus sensor, many three-dimensional measuring tasks can be solved
Technical Data
Sensor principle
Optical-axial (focus variation)
Accuracy
Permissible probing error up to 0.25 µm
Functionality
With the hardware of the image processing sensor (a) camera, b) imaging optics, c) measuring object and d) transmitted light illumination), images are taken in different positions on the optical axis. Based on the contrast gradient, the position of the workpiece surface is determined.
Werth Laser Probe WLP
Laser distance sensor according to the Foucault principle
.png)
Highly accurate scanning of surfaces
With conventional triangulation sensors, the measurement result depends very much on the structure and the angle of inclination of the surface. This leads to relatively large measurement uncertainties, which only allow the sensor to be used for less accurate measurement tasks. Better results are achieved with the Foucault laser sensor WLP (patent) integrated in the beam path of the Werth Zoom. This is particularly suitable for fast flatness measurements of surfaces tilted by up to 80° or correspondingly curved surfaces.
- The unique Foucault principle of the Werth Laser Probe offers applications beyond the limits of typical TTL (Through The Lens) lasers due to its special design
- The WLP is integrated directly into the beam path of an image processing sensor, so that very fast sensor changes are possible
- In measuring operation, the laser scanning can be observed very well visually
- High measuring speed when scanning contours or surface profiles
Technical Data
Sensor principle
Optical-axial (Foucault cutting edge)
Accuracy
Permissible probing error up to 0.75 µm
Functionality
Due to the asymmetry of the laser beam a) by the use of a Foucault cutting edge b), the diffusely reflected light hits different positions of the differential diode c), from which the distance to the workpiece surface d) is determined. A divider mirror e) is used to integrate the laser beam into an image processing sensor f) (illumination not shown).
Chromatic Focus Point Sensor CFP
Highly accurate chromatic focus point sensor
.png)
Precise scanning of surfaces
The chromatic measuring principle ensures low measurement errors and a high degree of independence from the surface properties. During scanning, many measurement points are captured in a short time. This results in a wide range of applications, even with high demands on measurement uncertainty and measurement time. Tightly toleranced sizes as well as mould and roughness can be measured.
- Measurement of sensitive and elastic workpieces
- Large measuring ranges of the sensor allow fast scanning without moving the device axes to the workpiece surface and thus even shorter measuring times
- Measurement of reflective or transparent surfaces possible
- Layer thicknesses of transparent materials can also be measured (option)
Technical Data
Sensor principle
Optical-axial (chromatic aberration)
Measuring range
0.3 mm to 3 mm
Accuracy
Permissible probing error up to 0.25 µm
Functionality
From the evaluation box a), the light from a broadband light source b) is projected via a fibre coupler c), an optical fibre d) and imaging optics e) onto the workpiece (position 1), 2) or 3)). The intensity of the reflected light is highest for the colour corresponding to the distance from the workpiece f). This is evaluated via a spectrometer g).
Chromatic Focus Zoom CFZ
Combination of image processing and chromatic distance sensor systems to form multi-sensor systems
.png)
Highly accurate measurements without sensor misalignment in all three spatial directions
The combination of several sensors into one multi-sensor offers increased ease of use and measurement time savings due to the elimination of sensor change cycles. With the different sensor principles, the patented CFZ has a high degree of flexibility. Due to the absence of sensor offset, a smaller and thus more cost-effective measuring machine can often be used.
- Low measurement errors due to high magnification range of the telecentric zoom optics
- Intelligent contour image processing detects multiple geometric elements and free forms in the measuring window
- Distance measurements largely independent of surface properties due to the chromatic measuring principle
- Fast sensor change without mechanical movement
- Large measuring range of the chromatic sensor enables fast scanning without moving the sensor to the workpiece surface and thus even shorter measuring times
- Layer thicknesses of transparent materials can also be measured (option)
Technical Data
Sensor principle
Optical-lateral / optical-axial (chromatic aberration)
Measuring range
1 mm
Accuracy
Permissible probing error up to 0.75 µm
Functionality
From the evaluation box a) the light of a broadband light source b) is projected via a fibre coupler c), an optical fibre d) and an imaging optic e) onto the workpiece (position 1), 2) or 3)). The intensity of the reflected light is highest for the colour corresponding to the distance from the workpiece f). This is evaluated via a spectrometer g). Via a divider mirror h) the additional integration of an image processing sensor i) (illumination not shown) takes place.
Chromatic Focus Line sensor CFL
Highly accurate chromatic focus line sensor
.png)
Precise and fast scanning of surfaces
The Chromatic Focus Line sensor uses a linear arrangement of lots of chromatic sensors to capture measured values extremely quickly with up to one million measurement points in less than three seconds. The chromatic measurement principle ensures low measurement errors and a high degree of independence from surface properties. Areas of application include diffusely reflective as well as reflective and transparent workpieces.
- Adaptation of measuring uncertainty and measuring range to the respective application with different lenses
- Due to a large axial measuring range, it is often not necessary to track the device axes to the workpiece geometry
- The possibility to quickly create a raster image of the workpiece surface allows the formation of local coordinate systems for further measurements with other sensors
- Layer thicknesses of transparent materials can also be measured (option)
Technical Data
Sensor principle
Optical-axial (chromatic aberration)
Measuring range
0.2 mm to 4 mm
Accuracy
Permissible probing error up to 1 µm
Functionality
From the evaluation box a), the light from a broadband light source b) is projected onto the workpiece (position 1), 2) or 3)) via fibre couplers c), linear optical fibres d) and imaging optics e). The intensity of the reflected light is highest for the colour corresponding to the distance from the workpiece f). This is evaluated via a spectrometer g) for all measurement points on a line simultaneously.
Werth 3D Patch
Focus variation for 3D topography measurement
.png)
Simple optical measurement of complex surface topographies
The 3D patch is an area sensor based on the focus variation principle with automatic adaptation of the sensor parameters to the respective surface properties of the workpiece. The optical sensor enables fast 3D nominal-actual comparisons of surface areas or purely dimensional evaluations. With the 3D patch, the topography of even small detailed areas can be measured optically with high lateral resolution.
- An HDR function enables the capture of image stacks with different exposure times and the measurement of unevenly reflective surfaces
- Intelligent software functions are available for optimal setting of exposure times
- A wide range of filter options ensures reproducible and reliable results
- Calculation of control geometry elements possible through automatic segmentation
Technical Data
Sensor principle
Optical-axial (focus variation)
Accuracy
Permissible probing error up to 0.25 µm
Functionality
With the hardware of the image processing sensor (a) camera, b) imaging optics, c) measuring object and d) incident light illumination), images are taken in different positions between z1 and z2 on the optical axis. Based on the contrast gradient, many measurement points on the workpiece surface are determined simultaneously.
Nano Focus Probe NFP
Highly accurate confocal sensor
.png)
Highly accurate topography measurements independent of reflectivity
With the Nano Focus Probe, the workpiece surface can be captured as a 3D point cloud and the size, mould, position and roughness on micro-structures can be evaluated. Stray light suppression enables reliable 3D measurement of the topography even of reflective surfaces with probing errors in the submicrometre range. The confocal optical sensor also delivers good results on steep flanks with large angles of inclination.
- Different lenses allow the sensor to be adapted to the task at hand
- The sensor can be used in the entire measuring volume of the coordinate measuring machine and the measurement results can be linked in the same coordinate system
- A total surface can be calculated from several adjacent partial point clouds almost without loss of accuracy
Technical Data
Sensor principle
Optical-axial (confocal microscopy)
Measuring range
Measurement “in the image” with integrated Z-axis 250 µm
Accuracy
Permissible probing error up to 0.15 µm
Functionality
By moving the probe head with a) illumination, b) camera, c) pinhole and d) imaging optics relative to the workpiece e) the intensity of the light points f), g) is varied by defocusing. The overlapping of the defocused light points f) is avoided by large distances g).
Werth Interferometer Probe WIP
Highly accurate non-contact distance sensor
.png)
Measuring the smallest geometries with the highest precision
The WIP is a non-contact fibre optic sensor for highly accurate measurement of geometry, mould and roughness. Probe geometries can be individually adapted with regard to the necessary exit angles for probing the workpiece surfaces. Due to the small probe dimensions, the WIP is particularly suitable for capturing small, difficult to access and deep geometries and is thus part of Werth’s special expertise in the measurement of micro-geometries as well.
- In RS version, the WIP allows highly accurate roundness measurement with rotatable probe
- Due to the guideway of the fibre in a metal tube, the probes can also be offered in very long lengths for large probing depths
- The grinding of the probe determines the exit angle of the measuring beam between 0° and 90°, probes with a 90° angle are used, for example, for measuring the lateral surfaces of small bores
Technical Data
Sensor principle
Optical (short-coherent interferometry)
Measuring range
300 µm
Accuracy
Permissible probing error up to 0.2 µm
Functionality
With a superluminescent diode a) and a measuring probe c) connected via a fibre coupler b), the information about the time difference of the light reflected at the probe exit surface d) and the workpiece surface e) is measured.c) and the workpiece surface e) is projected by the interferometer (imaging optics f), beam splitter g), mirrors h) and i) and cylindrical lens j)) onto a line camera k) and the distance is determined from this.
Laser Line Probe LLP
Laser distance sensor according to the triangulation principle
.png)
Fast digitising of even larger surfaces
With the LLP laser line sensor, a laser line (light section) is projected onto the surface of the measuring object and evaluated accordingly via a triangulation process. This non-contact sensor allows fast measurement of even large workpieces with coarser tolerances. The application is therefore largely concentrated on housing and cover parts with free-form surfaces, which are primarily designed according to aesthetic considerations.
- Determination of topography with high point density
- Automatic intensity control and intelligent software enable convenient and reliable measurement of a wide variety of surfaces
- High measuring frequencies even on glossy and highly absorbent surfaces
- The LLP can be rotated and tilted in conjunction with the PH10M and can be exchanged for other sensors
Technical Data
Sensor principle
Optical-axial (triangulation)
Accuracy
Permissible probing error up to 50 µm
Functionality
The laser beam generated by a laser diode a) is expanded into a line, projected onto the workpiece b) and the reflected beam is imaged onto the matrix camera d) with the aid of imaging optics c). The measurement points on the workpiece surface are determined from its position.
Tactile Sensor
Measuring stylus SP25M
Compact scanning probe
.png)
Flexible tactile measurement
The SP25M is a measuring tactile sensor in compact design. The 3D scanning probe can be used optionally for scanning and for point-by-point 3D measurements on the coordinate measuring machine. Different scanning modules ensure optimum results with different probe lengths. The tactile probing system is ideal for mould and geometry measurements and is fully integrated into the Werth multi-sensor concept.
- Compact design makes the SP25M compatible with the PH6M fixed mount as well as the PH10 rotary/tilt head
- Fast changing of SP25M probe systems with three (FCR25-L3) or six storage locations (FCR25-L6) as changing rack for direct mounting on the measuring machine
- FCR25 changing rack as add-on unit for direct mounting on the modular changing rack MRS
Technical Data
Sensor principle
Tactile-electrical
Accuracy
Permissible probing error up to 0.75 µm
Functionality
On contact with the workpiece, the stylus is brought into the nominal deflection with the aid of the coordinate axes. The exact deflection is measured using a triangulation process, superimposed with the coordinates of the machine’s scale systems and saved as a measurement point.
Measuring stylus SP80
High precision scanning probe
.png)
Tactile measurement with highest accuracy
The SP80 is a measuring tactile sensor that impresses with the highest precision at high scanning speeds. The high-resolution tactile probing system is fully integrated into the Werth multi-sensor concept. The application focus of the 3D scanning probe is on 3D measurements that require high accuracy or the use of long and heavy stylus configurations.
- Determination of topography with high point density
- Automatic intensity control and intelligent software enable convenient and reliable measurement of a wide variety of surfaces
- High measuring frequencies even on glossy and highly absorbent surfaces
- The LLP can be rotated and tilted in conjunction with the PH10M and can be exchanged for other sensors
Technical Data
Sensor principle
Tactile-electrical
Accuracy
Permissible probing error up to 0.6 µm
Functionality
On contact with the workpiece, the stylus is brought to the target deflection using the coordinate axes. Using a triangulation process, the exact deflection is measured, superimposed on the coordinates of the machine’s scale systems and stored as a measurement point.
Werth Fiber Probe® WFP 2D
Highly accurate tactile-optical 2D micro-probe
.png)
Precision measurement of micro-structures
The patented Werth Fiber Probe® WFP 2D has set the industry standard for micro-probes for decades and enables highly accurate tactile measurements of extremely small geometries with the smallest probing forces. Due to its low probing forces, the WFP® is also suitable for calibrating optical measurements on workpieces with sensitive surfaces. Typical areas of application are rubber and plastic parts, gauges, spinnerets, micro-gears and micro-bores on injection nozzles and turbine blades.
- Due to the direct evaluation of the stylus tip, the WFP® achieves probing errors in the range of a few tenths of a micrometer
- Bending of the stylus shaft has no influence on the measurement result
- The resolution of the fiber probe is in the nanometer range and is ultimately only dependent on the optics used
- In scanning mode, the Werth Stylus® records a wide range of contours with a large number of measurement points, whereby the stylus is permanently kept in motion by a vibration generator in order to avoid stick-slip effects
Technical Data
Sensor principle
Tactile-optical
Accuracy
Permissible probing error up to 0.3 µm
Functionality
An image processing sensor (a) camera, b) imaging optics) is used to measure the deflection ΔL of the stylus tip illuminated by an LED c) when the workpiece e) moves. In the target deflection, the exact position of the stylus tip is superimposed with the coordinates of the scale systems of the machine and stored as measurement points or used for the scanning process. Dual-sphere probes f) achieve a greater probing depth than single-sphere probes g).
Werth Fiber Probe® WFP 3D
Highly accurate tactile-optical 3D micro-probe
.png)
Precision measurement of 3D micro-structures
This patented tactile-optical 3D micro-probe extends the application range of the proven Werth Fiber Probe® technology to 3D measurements. It has a number of benefits over conventional micro-probes according to the mechanical-electrical principle. The WFP® is much less sensitive to breakage, offers smaller probe ball diameters (down to 20 microns) and has many times lower probing forces (less than one thousandth of a Newton). The Werth Fiber Probe® is part of Werth’s special feature in the measurement of micro-geometries.
- Measurement with the 3D fiber probe can be carried out in single-point as well as in scanning mode
- Special probe systems are available for scanning mode that enable reliable capture of profile curves on workpiece surfaces, e.g. by spiral scans with a preset contour
- Micro-probes with angled geometry, e.g. for measuring internal geometries, are also available
- Two-ball styli (patent) are also available to avoid aperture-related measurement errors
- In combination with suitably accurate coordinate measuring machines, such as the Werth VideoCheck® UA, the WFP® 3D has probing errors of only a few tenths of a micrometre
Technical Data
Sensor principle
Tactile-optical
Accuracy
Permissible probing error up to 0.25 µm
Functionality
With an image processing sensor (a) camera, b) LED for illumination) and an optical distance sensor c) the horizontal and vertical deflection of the illuminated stylus tip d) is measured when the workpiece e) moves. In the target deflection, the exact position of the stylus tip is superimposed with the coordinates of the scale systems of the machine and stored as measurement points or used for the scanning process. The exchange unit f) with flexible holding element g) is also available with dual-sphere probes h).
Werth Contour Probe WCP
Tactile-optical contour sensor
.png)
Flexible measurement of roughness, waviness and contour
Tasks that were previously reserved for contour measuring instruments can be solved by the Werth Contour Probe on the multi-sensor coordinate measuring machine. For the first time, the tactile-optical contour probe enables tactile contour measurement in defined workpiece coordinates. In contrast to classic contour measuring instruments, the special guideway system of the WCP allows scanning in any cross section without preferred direction.
- Roughness can also be measured CNC-controlled and contours can be scanned in the workpiece coordinate system without reclamping the workpiece
- Roughness values can be calculated according to standards with the help of the roughness library integrated in the WinWerth® measurement software
- The sensor can be replaced CNC-controlled via a changing rack
Technical Data
Sensor principle
Tactile-optical
Accuracy
Permissible probing error up to 2 µm
Functionality
With the tactile-optical contour sensor, a laser distance sensor a) (b) magnetic interface, c) mirror, d) bearing) is used to measure the deflection of the contour probe tip e) while scanning the workpiece surface f).
Switching stylus TP200
High precision and compact 3D scanning probe
.png)
Economical tactile measurement
The TP200 is a low-cost tactile sensor for point-by-point 3D measurement. The tactile probing system enables highly accurate measurements by using a strain gage structure and is fully integrated into the Werth multisensor concept.
- Quick-change stylus modules with standard probing force (SF) and low probing force (LF)
- Stylus module application (SF): general measuring tasks with standard styli
- Application stylus modules (LF): for use with small stylus balls and for measurement of sensitive materials
- Can be combined with MCR20 probe system changer with 3 or 6 memory locations for quick and easy exchange of probe systems without time-consuming recalibration
Technical Data
Sensor principle
Tactile-electrical
Accuracy
Permissible probing error up to 1.1 µm
Functionality
When contact is made with the workpiece, deflection of the stylus triggers an electrical signal to read out the coordinate measuring machine’s scale systems and the coordinates are stored as measurement points.
Accessories
.png)
Inquiry - Werth Sensor & Accessories for Multisensor Systems







.png)
